Web Platform
2.2) Asset Tree Creation
Updated at 3/13/2023
The first step in the process of initiating the deployment of Dynamox’s monitoring system is the creation of the company’s asset tree.
The Asset Tree is a visualization in the shape of a tree, with all the assets in which the system developed by Dynamox will be deployed. This functionality allows an overview of the organizational structure, facilitating the analysis and management of assets, through the hierarchy of units, sectors and machines of the company.
Through asset tree management you can create subworkspaces to reflect your company’s structure. To edit the tree, the user (with administrator permission) must access the “![]() ” option, in the upper right corner.
” option, in the upper right corner.
The gear symbol “![]() “, which will appear next to the name of each level will allow you to edit or delete levels. To add sub-levels, the user must click on the “
“, which will appear next to the name of each level will allow you to edit or delete levels. To add sub-levels, the user must click on the “![]() ” icon, next to the desired entity.
” icon, next to the desired entity.

Figure: Asset tree creation

Figure: Sub-area configuration
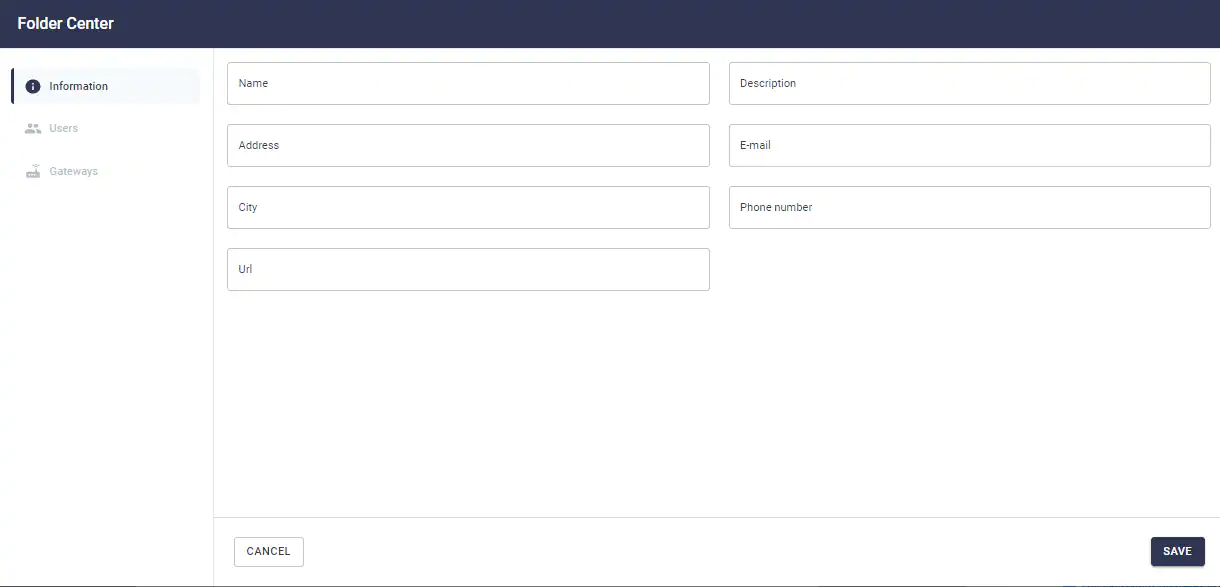
By selecting the Create Subworkspace option, a new window will open, asking for information to create this subfolder. In addition, in the “users” tab, you can manage the users that will have access to this subfolder (for more information on user management, see the next section on user management). After saving, the subfolder will be created.

Figure: Subworkspace configuration

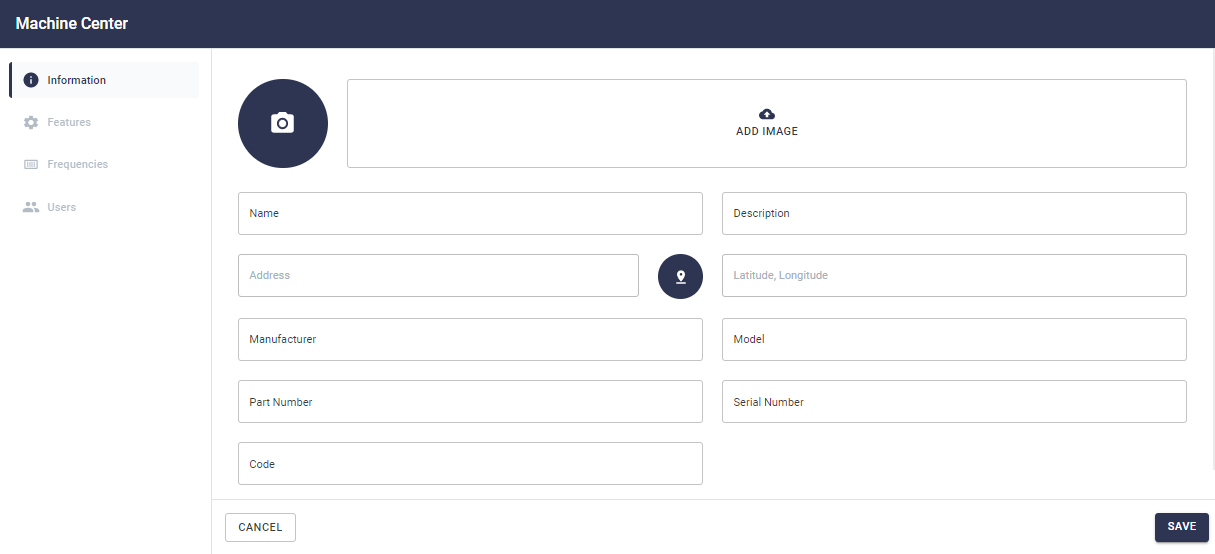
Figure: New Machine Setup Tab
- Machine name (required): used to identify the machine.
- Machine description (optional): information regarding function, position, shape, etc.
- Address (optional): Location where the machine is installed. It’s possible to use geo-reference, via Google Maps.
- Image (optional): it’s possible to register a picture of the machine.
- Other information: manufacturer, machine model and other items can be optionally entered.
2) Characteristics
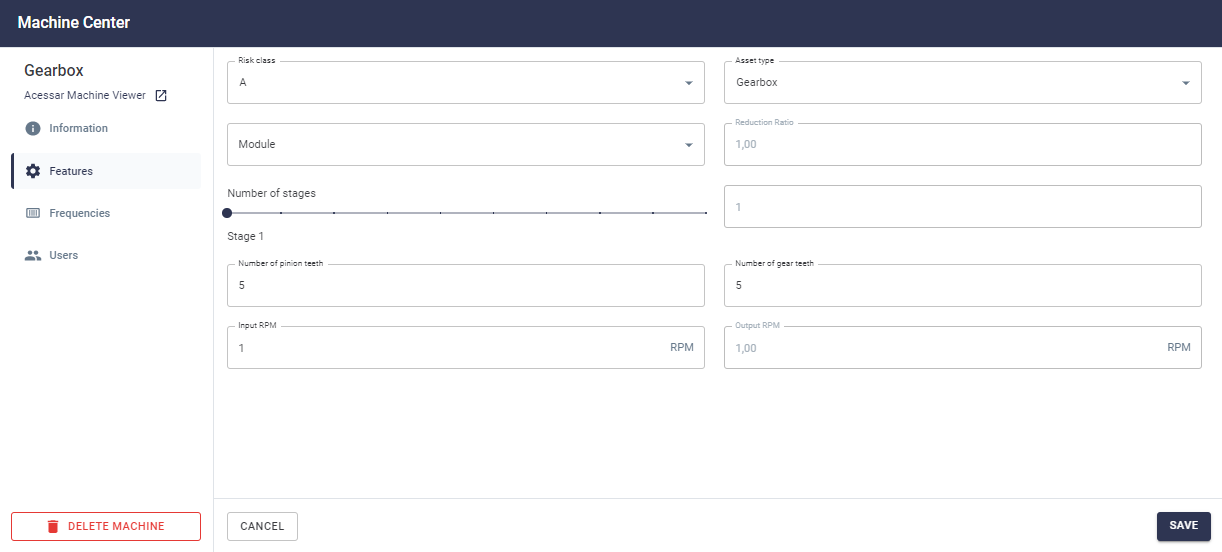
– Risk class (optional): Criticality of the machine (Business Risk, A, B, C, D)
– Type (optional): A choice list presents options with different asset types. Depending on the machine chosen, you will be asked for technical data regarding the referred asset model. Below, there is an example on how to fill in the information for a gearbox.

Figure: Filling in the characteristics of the monitored machine
Machine characteristic frequencies can be added in the “Frequencies” tab. Afterwards, the Spots created within that machine will inherit the frequencies created.
The process of inheriting the frequency from the in Spots is detailed in the section “Creating Spots”.
4) Users (optional)
It is possible to register users with machine-level subscriber permissions, so that they can receive notifications via e-mail if any configured alerts are triggered by one or more Spots.
Note: A user will not be able to access, edit or delete the machine to which he/she is subscribed unless he/she has the administrator or editor’s permission at a higher level than the one in the asset tree.
After filling in the requested information and selecting
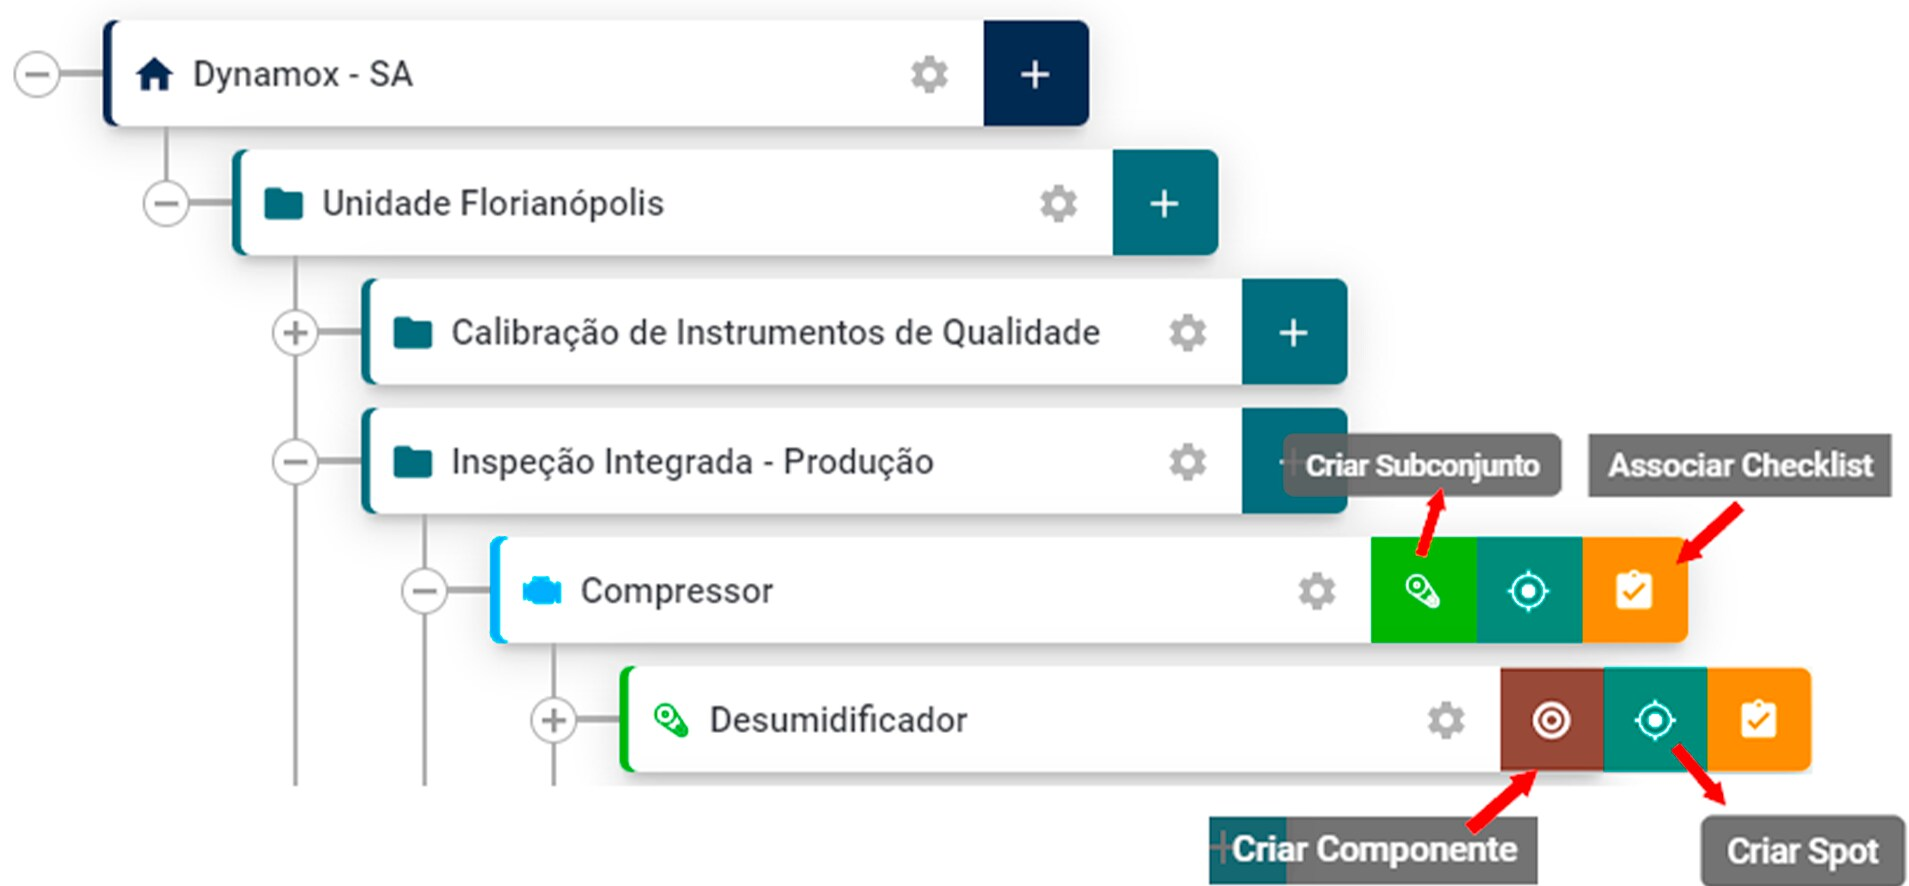
From this created machine level, you can create other new levels using the “

Picture: Options to create subset, component, Spot, and associate checklists
Note: The functions described above are only available to users with Administrator permissions.
Back to articles